Getting Started with Jewelry Studio Manager

Follow these step-by-step guides to set up your studio, manage clients and commissions, and make the most of every feature. You will be up and running in minutes.

Quick Navigation
1

Install & Setup

Getting started takes just a few minutes. Install Jewelry Studio Manager from the Shopify App Store and complete the guided setup wizard.

  • Find the app on the Shopify App Store and click Install
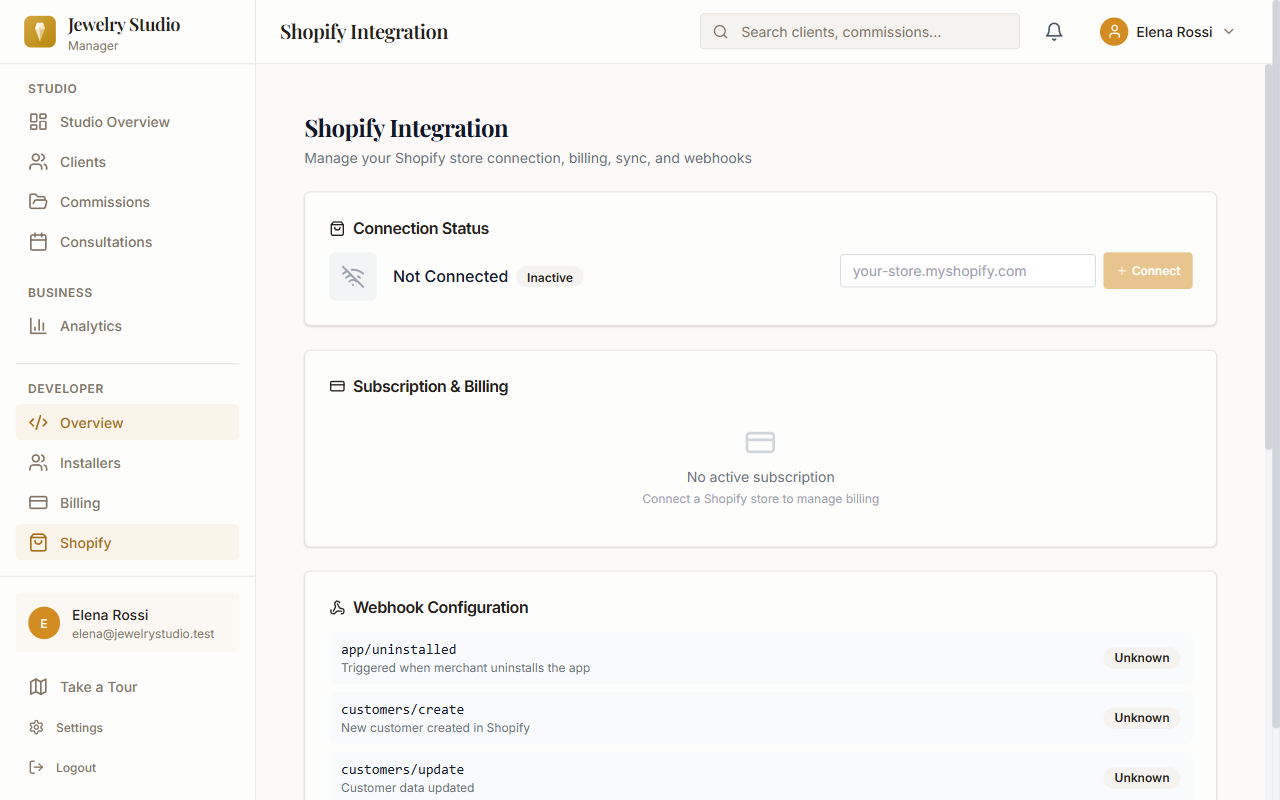
  • Authorize the app to connect with your Shopify store
  • Complete the 4-step setup wizard: enter your studio name, select your jewelry specialty (e.g., engagement rings, custom pieces, repairs), and configure your workflow stages
  • Your 14-day free trial starts immediately — no credit card required
Setup wizard showing studio name, specialty selection, and workflow configuration
2

Dashboard Overview

Your dashboard gives you an at-a-glance view of everything happening in your studio. See what needs attention right away.

  • KPI cards show your active commissions, total clients, monthly revenue, and upcoming appointments
  • Quick action buttons let you create a new commission, add a client, or schedule a consultation with one click
  • A summary of recent activity keeps you informed about status changes, new inquiries, and upcoming deadlines
Dashboard with KPI cards, quick action buttons, and revenue chart
3

Managing Clients

Build detailed client profiles that capture everything you need to deliver a personalized jewelry experience.

  • Add clients manually or sync from Shopify to import your existing customer base automatically
  • Store jewelry-specific details: ring sizes, preferred metals, gemstone preferences, style notes, and budget ranges
  • Use the Design Preferences tab to record inspiration images, style direction, and material choices for each client
  • View a complete history of commissions, appointments, and communications on every client profile
Client list view with stats, search, and filters
4

Creating Commissions

Track every custom piece from first inquiry through final delivery with the commission workflow built for jewelers.

  • Use the 3-step commission wizard: select a client, enter project details (type, description, materials), then set budget and timeline
  • Commissions move through jewelry-specific workflow stages: Inquiry → Consultation → Design → Approval → Production → Delivery
  • Attach design files, reference photos, and notes at each stage
  • Clients receive automatic notifications when their commission moves to a new stage
Commissions page with tracking and new commission button
5

Scheduling Consultations

Keep your studio calendar organized with built-in appointment scheduling that keeps both you and your clients on track.

  • View your schedule in a built-in calendar view with day, week, and month layouts
  • Create appointments with type (initial consultation, design review, fitting, pickup), duration, location, and notes
  • Automatic email reminders are sent to clients before their appointment so they never miss a visit
  • Clients can also request appointments through the client portal
Calendar view with consultation scheduling and stats
6

Client Portal

Give your clients a professional, branded space to stay connected with their commission and your studio.

  • Share a branded portal link with each client — they log in with their email and a secure password
  • Clients can view real-time commission progress, see which stage their piece is in, and review timeline updates
  • The design approval workflow lets clients approve or request revisions directly through the portal
  • Clients can also book appointments, submit feedback, and view shared documents from one place
Client portal login page with branded design
7

Analytics

Understand your business performance with clear, actionable reports designed for jewelry studios.

  • Revenue tracking shows monthly and yearly earnings, average commission value, and trends over time
  • Customer insights reveal your most active clients, popular services, and conversion rates from inquiry to completed commission
  • Visual charts and summaries make it easy to spot opportunities for growth
Analytics dashboard with revenue forecast, churn risk, and dashboard options
8

Shopify Integration

Connect your Shopify store to keep customers, orders, and products in sync across both platforms.

  • Navigate to Developer → Shopify in the sidebar and click Connect Store
  • Authorize the connection — your Shopify customers are automatically synced as clients in the studio manager
  • New Shopify orders can be linked to commissions for a seamless workflow
  • Sync runs automatically so your data stays up-to-date without manual work
Shopify integration page with connection status and webhook configuration

Ready to Get Started?

Install Jewelry Studio Manager and follow these steps to organize your studio today.

Install Free on Shopify